포인트 추가 : 해당 위치에 마우스 클릭 포인트 선택 : 해당 포인트를 마우스 클릭 포인트 선택 해제 : 모델 이외의 지점 클릭 포인트 제거 : alt 클릭 시작점 보기: ctrl 포인트 클릭 포인트 이동: move 모드에서
여러개의 포인트 이동 : draw사이즈 up 포인트 크기 : scale모드에서 커넥션 라인 지우기 : 중간에 새 포인트를 추가한 다음, 지운다. geometry를 topology로 바꿀때 : shift 클릭 unerease geometry : shift alt 클릭, 또는 paint된 영역을 shift클릭
Quick Start 1 polymesh 모델을 임포트(primitive는 사용X) 2 edit mode로 3 툴에서 지스피어 선택 4 tool>rigging>select 임포트한 모델 선택 5 tool>topology>edit topology on
Editing existing topology1 모델 임포트 2 툴에서 zsphere선택 3 모델을 clone 4 모델의 레벨을 낮춰줄 것. 5 tool>rigging>projection on으로 6 tool>topology>select topo 7 tool>topoloty>edit topology
그 외 관련사항 메모 *topology는 선택된 서브툴에 대해서만 작용하고, 완성된 오브젝트가 되지 않는다. 현재까지는, 일단 obj익스포트 한 다음, 다시 import해서 add하는 방법밖에. *지스피어로 뼈대를 만들고, topology 메쉬로 감쌀 수 있다. 지스피어 뼈대를 Rig로 사용할 수 있음. *mesh extratction처럼, 옷이나 갑옷 등을 만들 때 활용할 수 있음. geometry에 대한 컨트롤을 제공한다는 장점이 있음. *topology rigging - 기술적으로 결점이 있으나 일단 간단한 transpose 가능. --> 좀 더 자세한 사항 볼 것.
*Tool>Geometry>Suv setting before dividing the mesh
*if/when you have two uv regions is go to tool > subtool > grp split. and physically split your mesh into two parts (based off of your uv regoins).
your normal map will then be generated correctly.
*The workflow a maquette and scan it into ZBrush-->by generating a Ztool using the topology tools, you can recreate the mesh with a uniform polygon density --> major changes to the form using a lower subdivision level-->sculpting the details *it is important not to work with a high subdivision level too early. *seams in the normal map can be removed using BodyPaint.
*Maya is limited to 1.5 million polygons.
*Although there are couple of ways to apply normal maps in Max, the Projection modifier using a cage is the best method.
*To view a normal map within the viewports apply the rendered normal map to the Bump channel.
*Illuminate Lab’s Turtle, a plug-in for Maya. It can create normal maps by transferring one surface to another.
*use normal maps when it makes sense. For example, it makes no sense to apply a 512 by 512 normal map to a model that only has 2400 polygons. At this resolution, the normal maps will make no difference in the final render. The key is to find the sweet spot that optimizes the CPU/GPU loading.
* Visible seams is another tricky spot for normal maps. To see the seams, have a developer write a shader that shows a preview of the normal tangents. This makes it easy to see the seam problems. To fix seams, paint over them with a 127 red brush with the Clone tool in Photoshop. A more aggressive solution is to break down the geometry, flip the normals along the seam and add a weight value. You can also improve the final results by using a 4X anisiotropic filter. It is also important to keep all seams straight in UV space.
Hide 된 포인트가 있으면 경고창이 뜬다. 모든 메쉬를 visible로 두고 세이브 하도록.
세이브된 파일은 start up list에 뜬다.
단축키 지정할 수 있음.
Hotkey 'B'
최상위 서브툴과 선택된 서브툴의 visibility를 토글
Hotkey 'N'
커서아래의 서브툴의 이름을 보여주면서 그 서브툴을 select할지 여부를 옵션으로 고른다.
Pop up Interface
---MultiAppend---
Ztool을 서브툴에 append
obj파일을 불러아서 append.
---Duplicate---
선택된 서브툴을 duplicate 하여 리스트의 맨 아래에 추가해줌.
Hd Geometry는 복사되지 않음.
---Mirror---
선택된 서브툴을 Duplicate 한 다음 mirror. 메쉬에 add 할 것인지 새 서브툴로 append 할 것이지를 옵션으로 선택. 가장 높은 sdiv레벨에서 mirror하면, merge 되거나 append 된 서브툴의 낮은 레벨 정보는 사라진다.
---Merge---
서브툴을 visible로 둔 상태에서 merge할 것. 나머지 서브툴들을 보존하거나 없앨지 옵션으로 선택. 'Preserve existing Polygroups'에 체크하면, Merge한 메쉬는 각각의 서브툴에 맞추어 polygroup으로 바뀐다. 서브툴의 현재 sdiv레벨은 사용하고 있는 것으로 다른 레벨이나 any HD Geometry는 사라진다.
---Fill---
Visible 상태인 서브툴을 컬러나 material로 채워준다.
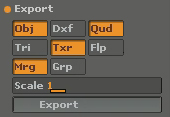
---Export---
visible상태인 서브툴을 Obj나 DXF파일로 익스포트
---Delete InVisible---
visible상태가 아닌 서브툴을 지움. Undo되지 않으니 주의할 것.
---HiRes All---
모든 서브툴을 가장 높은 레벨로 세팅
---LowRes All---
모든 서브툴을 가장 낮은 레벨로 세팅
---Layers>SubTools---
현재의 3d layer를 visible상태의 서브툴에 카피???
* Copies the current 3D Layer status to the visible subtools.
* Layer intensity slider adjusted and visibility set.
* Creates new layers as necessary or switches off extra ones.
* Useful if you want to transfer in poses using layers or quickly show the Art Director alternative treatments.
---Shift Up---
visible상태의 서브툴을 리스트의 맨 위에 그룹으로 생성해줌
---Version Number panel---
맨 아래의 버전 넘버 부분을 클릭하면 단축키 지정을 바꿀 수 있다.
임시 버튼은 ZPlugin의 서브 메뉴에 생기며, 버튼을 Ctrl + 클릭하여 단축키를 지정한다. 이 버튼들은 단축키 지정에만 쓰이며, Ctrl 키를 누르지 않고 그냥 클릭하면 버튼을 없앨수 있다. 이 버튼들을 닫으려면 버전 넘버 부분을 다시 클릭한다.
NOTES
- 선택된 서브툴은 눈모양 아이콘과는 관계없이 항상 visible 상태로 변한다.
- 몇몇 툴 – 예를 들면 Merge – 는 zspheres나 parametric primitives와는 작동하지 않을 수 있다.
-서브툴이 merge 되었을 때, 결과물의 폴리곤 개수가 500,000개를 초과한 경우 경고 메시지가 뜬다. 계속 진행할 것이지는 사용자가 선택
- MultiAppend 를 사용할 경우, 기존에 서브툴이 없거나, 맨 처음에 사용하는 툴로 default Polymesh3D star ztool이 선택되 있으면, OBJ파일을 append하는 것이 작동하지 않을 수 있다. (지브러시가 파일을 import 하는 방식 때문). 이 경우 Polymesh3D tool에서 클론을 사용해 보시오.
-uv texture manager>image>iamge range ->max를 1 이상으로 각 부분을 다른 사분면으로 옮겨줌 ->uv group에 반영됨 -원본 object를 duplicate하여 mesh를 정사각형으로 와이어가 배치되도록 split edge - obj로 익스포드 - tool>sub tool>group split ->uv그룹에 따라 각각을 툴로 나누어줌 = sub tool -tool - layers - new 각 레이어에 따라서 스컬럽팅한 것을 on/off가능 intensity 강도 조정가능 - 알파 선택 -> ctrl+드래그
* layer -> fill document사이즈 안에서 repeat되고 있다. 타일맵 만들때 유용할 듯
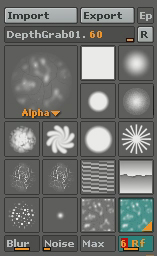
alpha rf -> radial fade 알파 사용할 때 가장자리 부분을 부드럽게 제외할때
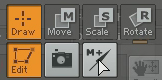
* Zsphere ? 반구에 색깔 차이는 어떤 이유에서? 커서가 green인 상태에서 마우스 클릭 드래그. 정확한 포인트에서 생성하기 위해 symmetry 이용. shitf키 -> 방금 그렸던 구 사이즈와 같게 move로 볼 위치 이동 - symmetry 이용(단축키x, ,y,z) , draw size를 조정해서 적용범위 조절 scale -> 좌우로 드래그 rotate ->joint를 잡고. 좌우로 드래그 draw모드에서 alt+클릭 ->Zsphere없애기
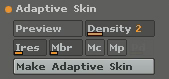
tool->adaptive skin preview -> 단축키 a 각각 버튼 테스트 해 보시오 ->연결부분에 대한 설정 mp를 사용하기 보다는 zspear를 추가하는 쪽이 효율적이라는 의견
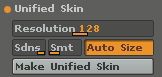
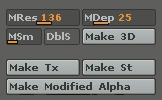
tool->unified skin make unified skin하면 tool선택칸에 새롭게 추가됨 균일한 폴리곤으로 구성된 메쉬로 바꾸어줌. z brush 내에서 스컬럽팅하기엔 유용
transform -> marker (단축키 m) tool -> multimarkers --->함께 사용하기. marker클릭 -> 오브젝트 배치 -> (추가한 개수만큼 반복) ->new document에서 multimarkers클릭 ->modifier - make polymesh multimarkers로 추가된 각각은 polymesh group상태임
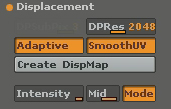
* displacement map
<-튜토리얼 안에서 설정한 것 sdiv를 최하로 내려놓을것. spsubpix - 디테일. 계산오래걸림 adaptive - 디테일이 들어간 부분에 따라 다르게 intensity - 보통 8로 mid value - 0값이면 완전히 블랙이 됨 mode - 켠 경우 완전한 디스맵 생성. 끄면 범프 정도만
export 옵션 마야 사용하는 경우
draw -> pers. distort값 조절 - focal과 유사. 카메라 렌즈에 의한 왜곡
* layer 순서는 디스플레이되는 이미지와 무관함. 선택되지 않은 레이어는 2.5상태 bake - 빛과 그림자 정보 전부 렌더->이미지상태. adjust 불가능해짐
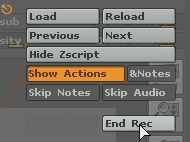
zscript ->end rec 현재까지 작업한 과정을 저장 포토샵에서 액션을 녹화하고 재사용하는 것과 유사하다고 생각됨 일종의 튜토리얼로 활용가능