작업 준비
http://www.zbrushcentral.com/zbc/showthread.php?t=20310&highlight=zbrush+external+renderers <-출처
*photoshop에서 color setting
profile Mismatches -> ask when openig, missing when opening에 체크
-> 파일을 열때 leave as is로
*maya import - obj옵션
file type spesific option을 false로 설정
true로 할 경우 vertex order가 바뀔수있다.
* .map포맷으로 변환하기
방법1.
실행창에서 cmd
cd 현재 파일이 있는 폴더로 이동
imf_copy -p 파일이름.jpg 파일이름.map
방법2.
http://www.zbrushcentral.com/zbc/showpost.php?p=236569&postcount=77 에서 convertfile.zip를 다운받는다.
bat파일에 변환하려는 파일을 드래그해서 넣으삼
위 방법이 작동하지 않는경우
내컴퓨터->속성->고급->환경변수
시스템변수에서 Path선택 ->편집->줄 끝으로 가서 ;C:\Program Files\Autodesk\Maya8.5\bin -이라고 추가해준다
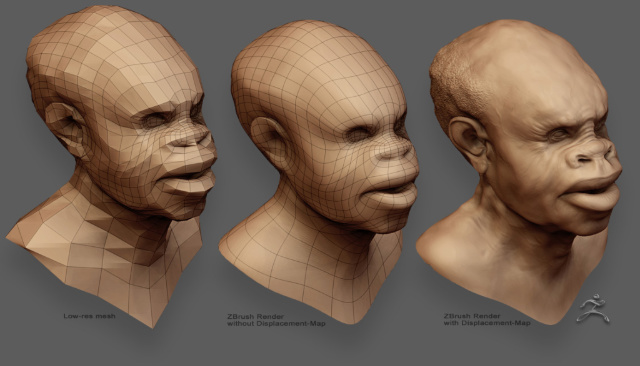
zbrush에서 디스맵 뽑기
방법1. tool>diplacement 설정
dpsubpix - 글로벌 서브디비전 <-> adptive 대체로 속도가 좀 더 빠르다
adptive에 문제가 있을 경우, 예를들면 가끔 pinch를사용했을 때 dp가 더 잘나오기도
둘 다를 체크해보시오
smoothuv사용하지 않아도 큰 차이가 없다는 의견.
생성된 디스맵을 alpha>de option에서, DE-HBEK-EAEAEA-R16
-> R16(rgb16bit), status on, vertical filp yes
export current
방법2. Z-brush2, multi displacement 옵션
UDIM: leave at default.
Initial File Index: leave at default.
Max Map Size: I find that 2048 works fine, but you can go up to 8K
Map Size Adjust: change this to 0.
DpSubPix: leave at 0, will use adaptive instead.
Border: can leave at 8, as this will actually overpaint UV seams. In my tests, it actually does an ok job of overpainting if your UV's arent that great.
-> Click the export options button in the multi-displacement 2 menu and make sure that D32 is off (as well as every other setting) and turn on R32.
* Paste this quickcode into the quickcode box for R32:
DE-LBEK-EAEAEA-R32
http://www.zbrushcentral.com/zbc/showthread.php?t=43264 <-출처
마야에 가져온 후의 작업순서
-오브젝트 attr에서 displacement에서 featured displacement 오프
winodow>rendering editers -> mentalray approximation editor
show in hypergraph 체크
subdiv... create하기
-오브젝트 attr에서 mentalraySubdivApprox
approx - parametric
n subdiv 조절 (높으면 디테일 업, 렌더타임 증가)
-하이퍼쉐이더에서 디스플레이스 맵을 연결해주기
-파일맵의 color balance에서 alpha offset에 =-file1(맵파일의노드이름).alphaGain/2; - 라고 써넣기 (zbrush맵이 회색이므로. 마야에서는 블랙을 높이0으로 처리하기때문)
-alphaGain값, n subdiv를 조절하면서 render
(오브젝트 스케일에 따라 alphaGain값이 다르게 조절해야 한다. ->16bit맵의 단점)
그 외 참고할 만한 것
http://www.zbrush.info/docs/index.php/ZBrush_To_Maya_Displacement_Guide
'Tutorials > Renderer' 카테고리의 다른 글
| Zbrush displacement to Renderman for maya (0) | 2008.07.24 |
|---|---|
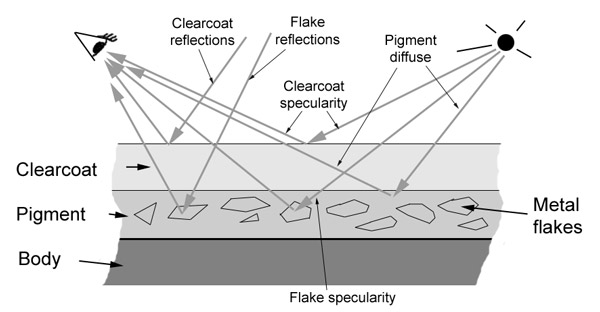
| mentalray. mi_metallic_paint (0) | 2008.06.08 |
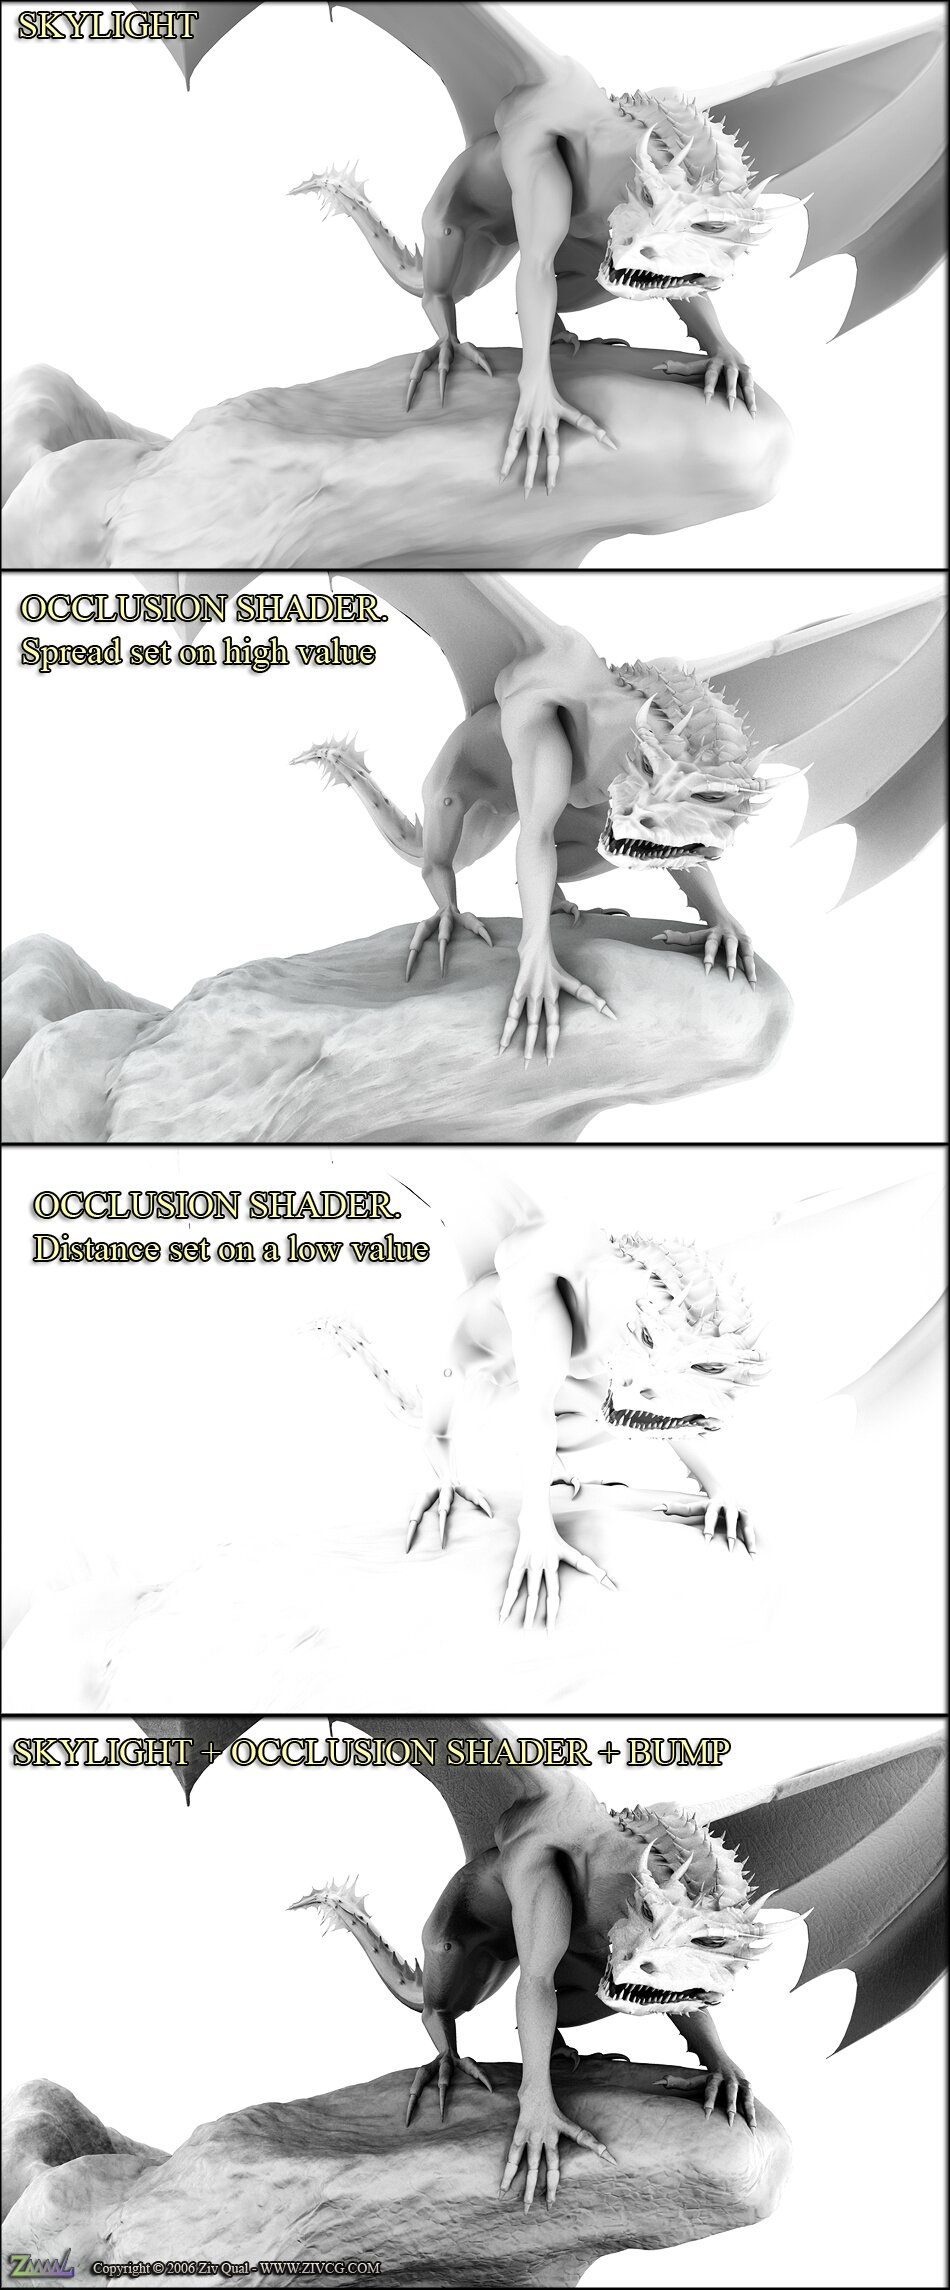
| occlusion pass 활용하기 - 멘탈레이, 맥스 (0) | 2008.05.14 |