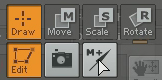
-uv texture manager>image>iamge range ->max를 1 이상으로 각 부분을 다른 사분면으로 옮겨줌 ->uv group에 반영됨 -원본 object를 duplicate하여 mesh를 정사각형으로 와이어가 배치되도록 split edge - obj로 익스포드 - tool>sub tool>group split ->uv그룹에 따라 각각을 툴로 나누어줌 = sub tool -tool - layers - new 각 레이어에 따라서 스컬럽팅한 것을 on/off가능 intensity 강도 조정가능 - 알파 선택 -> ctrl+드래그
* layer -> fill document사이즈 안에서 repeat되고 있다. 타일맵 만들때 유용할 듯
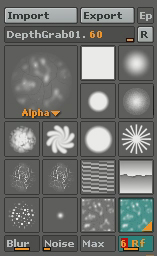
alpha rf -> radial fade 알파 사용할 때 가장자리 부분을 부드럽게 제외할때
* Zsphere ? 반구에 색깔 차이는 어떤 이유에서? 커서가 green인 상태에서 마우스 클릭 드래그. 정확한 포인트에서 생성하기 위해 symmetry 이용. shitf키 -> 방금 그렸던 구 사이즈와 같게 move로 볼 위치 이동 - symmetry 이용(단축키x, ,y,z) , draw size를 조정해서 적용범위 조절 scale -> 좌우로 드래그 rotate ->joint를 잡고. 좌우로 드래그 draw모드에서 alt+클릭 ->Zsphere없애기
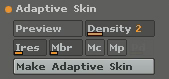
tool->adaptive skin preview -> 단축키 a 각각 버튼 테스트 해 보시오 ->연결부분에 대한 설정 mp를 사용하기 보다는 zspear를 추가하는 쪽이 효율적이라는 의견
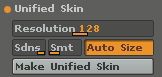
tool->unified skin make unified skin하면 tool선택칸에 새롭게 추가됨 균일한 폴리곤으로 구성된 메쉬로 바꾸어줌. z brush 내에서 스컬럽팅하기엔 유용
transform -> marker (단축키 m) tool -> multimarkers --->함께 사용하기. marker클릭 -> 오브젝트 배치 -> (추가한 개수만큼 반복) ->new document에서 multimarkers클릭 ->modifier - make polymesh multimarkers로 추가된 각각은 polymesh group상태임
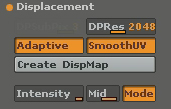
* displacement map
<-튜토리얼 안에서 설정한 것 sdiv를 최하로 내려놓을것. spsubpix - 디테일. 계산오래걸림 adaptive - 디테일이 들어간 부분에 따라 다르게 intensity - 보통 8로 mid value - 0값이면 완전히 블랙이 됨 mode - 켠 경우 완전한 디스맵 생성. 끄면 범프 정도만
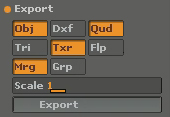
export 옵션 마야 사용하는 경우
draw -> pers. distort값 조절 - focal과 유사. 카메라 렌즈에 의한 왜곡
* layer 순서는 디스플레이되는 이미지와 무관함. 선택되지 않은 레이어는 2.5상태 bake - 빛과 그림자 정보 전부 렌더->이미지상태. adjust 불가능해짐
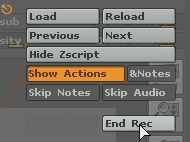
zscript ->end rec 현재까지 작업한 과정을 저장 포토샵에서 액션을 녹화하고 재사용하는 것과 유사하다고 생각됨 일종의 튜토리얼로 활용가능
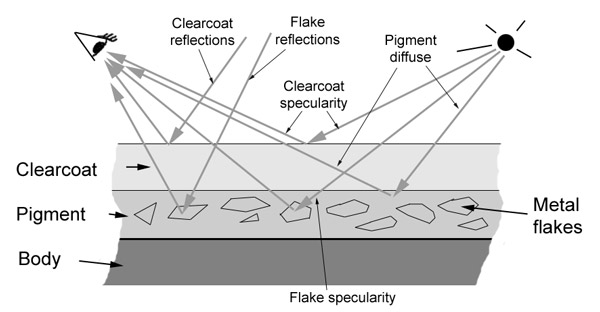
Car paint는 몇가지 특징을 가지고 있다. 차량 맨 위는, 차체가 앏은 층의 안료로 되어 있다. 이 층의 특징은, 실제로 보이는 색이 들어오는 빛의 입사각뿐만 아니라 보는 각도에 따라 달라진다는 것이다.
이 층 안에는 작은 금속 조각이 들어있다. 이 조각들은 빛을 반사하고, 각각의 조각들이 관찰자에게 직접 햇빛을 직접 반사하기 때문에, 맑은 날에는 반짝거리는 것처럼 보인다.
이 층 위는 clearcoat 층이다. 이 층은 왁스 코팅과 질에 따라, 반사가 더 잘 되거나 안 될 수도 있으며, 더 glossy하거나 덜 grossy할 수도 있다. 뚜렷한 점은, 이 층은 fresnel effect(glancing angle ?? 에서 빛이 더 반사되는 것?)가 나타나는 경향이 있다.
mi_metallic_paint
금속성의 페인트 느낌을 렌더링하기 용이하게 하기 위해 사용되는 쉐이더. 다만,
pigmentation and flakes (도료와 파편??)만을 다루며, clearcoat reflection은 중요하게 다루지 않는다. 완전히 효과를 내려면, reflection shader와 함께 사용되어야 한다. (예를 들면, base_material에 mib_glossy_reflection을 연결) 그리고 flake를 표현하려면 범프 쉐이더가 필요하다. (mi_bump_flakes)
쉐이더가 지원하는 기능
- Diffuse reflection은 pigmentation-도료 레이어에, 들어오는 빛의 각도와 보는 각도에 따라 변하는 컬러를 선택할 수 있음
- metallic flakes에서 lightsource에 의한 specular highlight 지원
- clearcoat 에서 lightsource에 의한 specular highlight 지원 (옵션 : glazing-광택 mode)
- metallic flakes에서 추가로 레이트레이싱 reflection 지원
Diffuse parameters
Ambient : ambient light에 관한 요소이다. 다른 쉐이더 들과는 달리, 오브젝트의 기본 색깔 보다는 들어오는 빛을 나타낸다 ??? --> Note that this parameter is treated differently to the ambient/ambience parameter pair of many other base shaders in that it is influenced by the other diffuse color parameters following, and hence represents incoming light, rather than the objects "ambient color".
base_color : 재질의 기본 diffuse 컬러
edge_color : glancing angles (가장자리)의 색깔 – 보통은 어둡게 보이는 경향이 있다. 스포츠 카에서 보이는 metallic paint에서는 거의 검정으로 보이는 경향이 있음.
edge_color_bias : edge로 갈수록 색깔이 줄어드는 정도 - falloff rate. 0.0에서 약 10.0까지가 유용함 – 0.0에서는 색깔이 완전히 사라진다. 더 큰 값에서는 edge 부분이 좁아지며, 낮은 값일수록 넓어짐.
lit_color 광원을 마주하는 부분에 보이는 컬러
lit_color_bias 컬러의 falloff. 0~10까지의 범위에서, 0은 효과를 off. 더 큰 값을 넣을수록 컬러 영역을 작고 좁게, 적은 값을 넣을 수록 크고 넓게. diffuse값의 전체적인 단계는 diffuse_weight 값으로 조정할 수 있음. diffuse_bias는 diffuse shading의 falloff를 조절. 대략0.5~2.0 사이 값 중, 1.0은 기본적인 lambert 쉐이딩을, 더 높은 값은 광원에 대한 diffuse peak를 밀어올리며, 적은 값은 퍼지게 한다???
irradiance_weight 는 표면에 대한 간접광의 영향(photons, final gathering)을 설정함. PI(<-??)값에 의해 분류된다 - 1.0값은 기본 1.0/PI
Specular parameters
spec specular highlight spec_weight a scalar multiplier spec_exp the phong exponent.
spec_sec secondary specular highlight spec_sec_weight a scalar multiplier spec_sec_exp the phong exponent
spec_glazing 기본 스페큘러에 glazing용 모드를 사용가능하게 해준다. 스페큘러 값에 threashold를 적용함으로써 더 윤기있고 반짝거리에 보이게 해줌. 예를들면 왁스칠을 한 스포츠카 처럼. 만약 고물차를 만들고 싶으면, 이 옵션을 끄시오.
Flake parameters
flake_color is the color (reflectivity) of the flakes, which is generally white.
flake_weight is a scalar multiplier for the above color.
flake_reflect defines the amount of ray traced reflection in the flakes, which allows glittery reflections of e.g. an HDRI environment. The value of 0.0 turns the effect off. The effect should generally be very subtle and a value of 0.1 is often enough. The final intensity of reflections also depends on flake_color and flake_weight.
flake_exp is the Phong specular exponent for the flakes.
Since flakes are inherently small, they can easily introduce rendering artifacts if their visual density becomes significantly smaller than a pixel. To avoid this the parameter flake_decay exists. It sets a distance at which the influence of flakes fade out. A value of 0.0 disables fading. Any positive value causes the flake_weight to be modulated such that it reaches zero at this distance.
flake_bump is the actual flake bump shader used. The shader mi_bump_flakes exists for this purpose, but any shader that modifies the normal vector (e.g. mib_passthrough_bump_map) can be used.
The shader put in the flake_bump may also return a color, which will be the color (intensity) of the flake, or it may leave the color unmodified.
Additional parameter
global_weight is a global tuning parameter that is a global multiplier to the output of the shader.
Finally mode is the light mode and lights the lightlist.
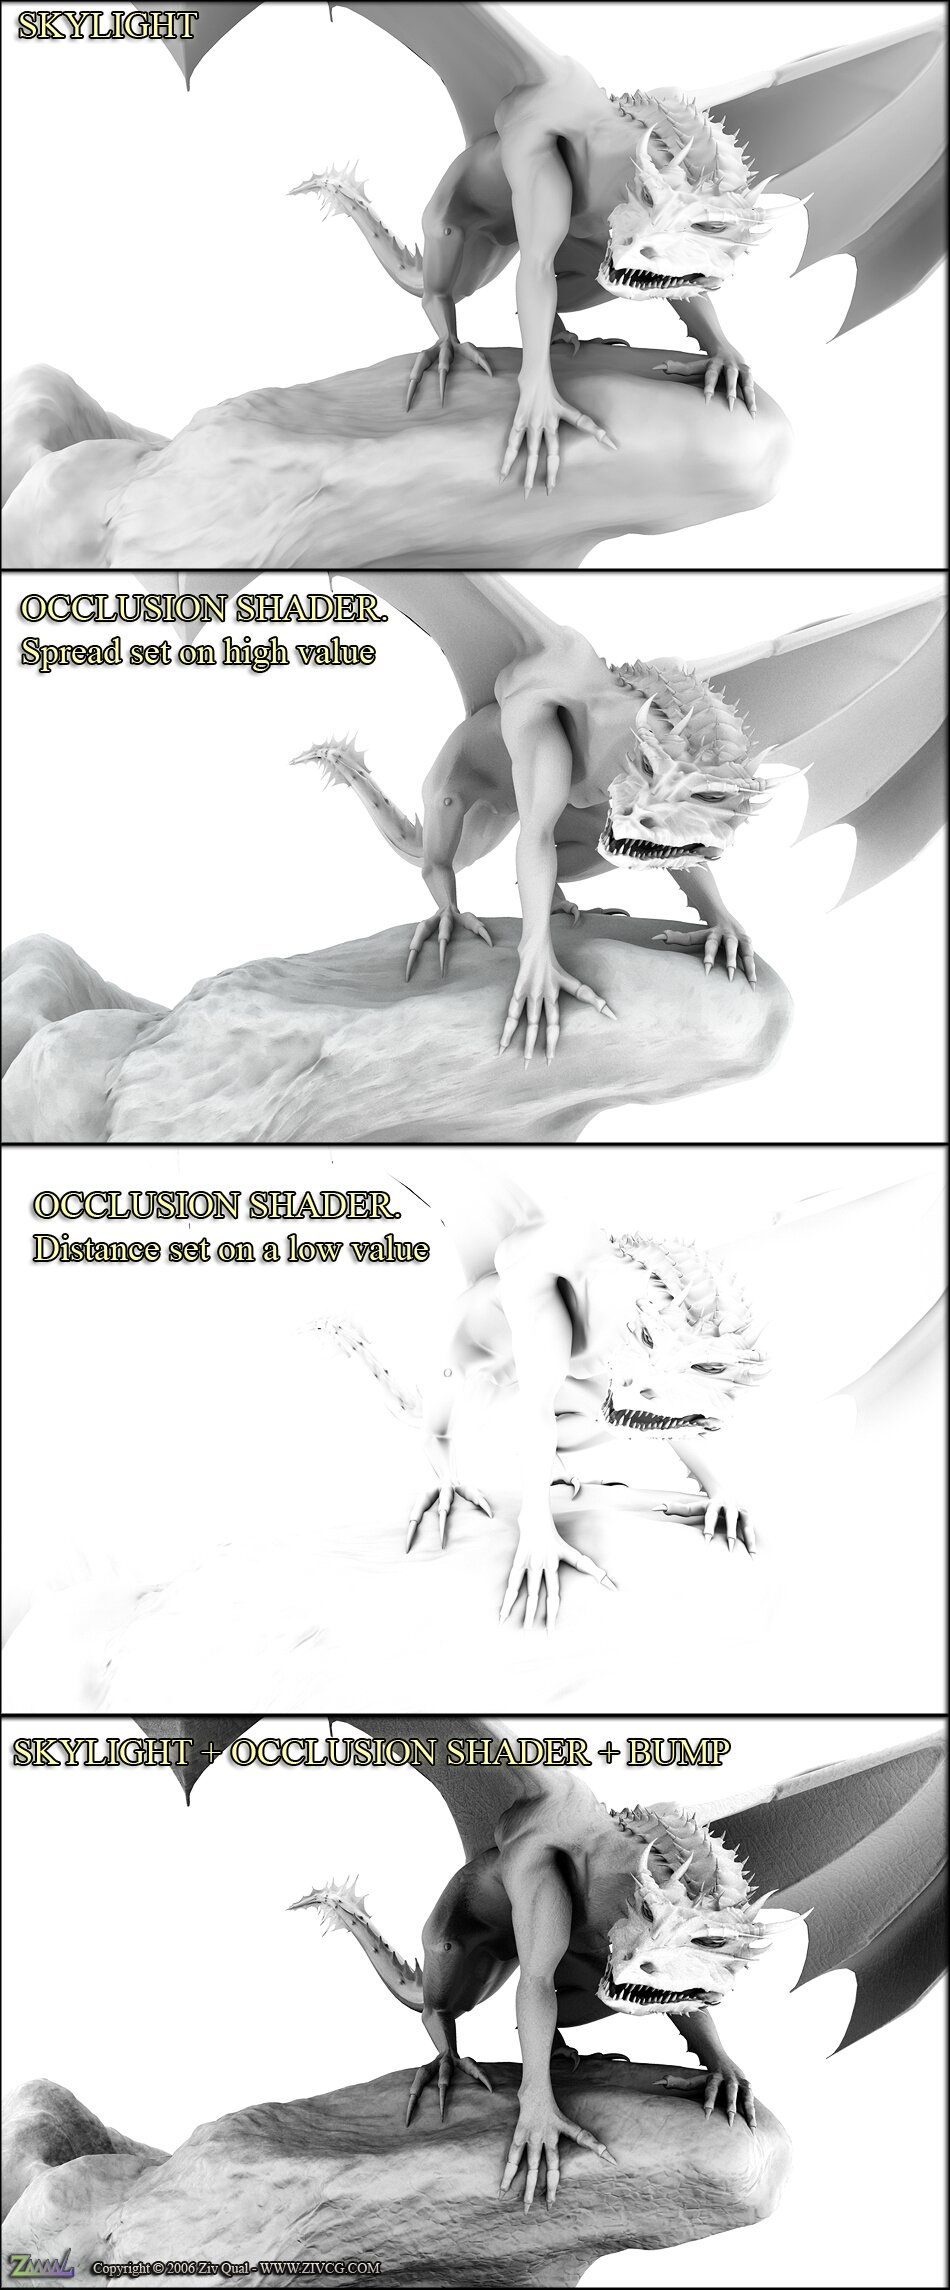
Object들이 전부 흰색이고, 균등하게 모든 방향에서 흰색 라이트를 주는 상황을 생각해보라. 기본적으로 텅 빈 흰색의 이미지가 될 것이다. 그러나 한 오브젝트가 다른 오브젝트에 떨어졌어야 하는 빛을 가로막는다면 어떻게 될까. 빛이 막힌 부분은 어두워 질 것이다. 더 많은 빛이 가로막힌다면, 표면은 더 어두워 질 것이다. 그러므로, 기본적으로 geometry가 서로 교차되는 부분이 어둡게 표현된 흑백 이미지를 얻을 수 있다.
occlusion pass를 얻는 방법 2가지 (MAX, Mentalray)
1. skylight 이용
- background color를 흰색으로, global light를 1.0으로
- 모든 오브젝트에 standard material로, 컬러를 흰색으로.
- 렌더링 옵션에서 final gather를 켜준다.
- 씬에서 라이트를 전부 지우고 skylight를 추가한 후, 색을 흰색으로.
- 렌더걸기
2. Ambient Occlusion shader 이용
( 대체로 빠름. 다양한 컨트롤 가능 / 초기 버전에는 쉐이더가 기본으로 포함되지 않기도)
- Sample – 보통 128정도면 충분한 퀄리티를 얻을 수 있다. 원하는 퀄리티와 렌더타임에 따라 조절할 것.
- Dark/bright – 그대로 둘 것.
- Spread – 높은 값일수록 그림자가 더 퍼지고 부드러워 보임.
- Max distance - 0값일 때 skylight과 같이 작용함. other value makes it calculate the occlusion "locally". this parameter determines the distance of the local calculation.(<-?) 실내씬에서 필수.
* Optional Tip
- bump map - Geometry를 넣거나 빼보기 - 여러 개의 pass로 렌더링 걸기
* 처음 렌더링에서는 간단한 라이트 세팅에서 시작한다.
포토샵에서 blending를 overlay나 multiply로 두고 opacity를 조절한다.
occlusion pass를 추가할 때마다 contrast의 정도를 크게 올리므로 주의할 것.